The Benefits Of Hiring Tile Cleaners For Your Business

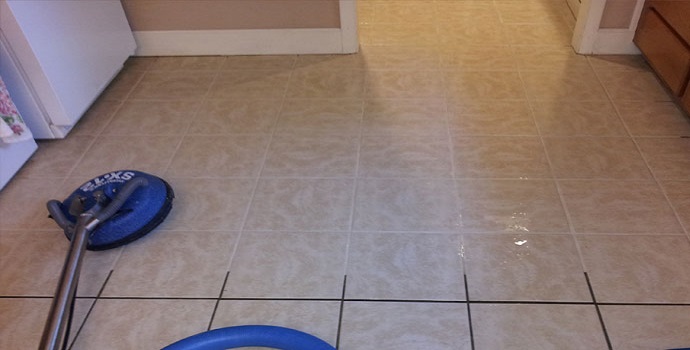
In the fast-paced world of business, maintaining a clean and presentable workspace is crucial. One often-overlooked aspect of cleanliness is the condition of your business’s tile surfaces. Tiles can accumulate dirt, grime, and stains over time, making your business premises appear unattractive and unsanitary. To address tile and grout cleaning issue effectively, consider the numerous benefits of hiring professional tile cleaners for your business.

Advantages of Professional Tile Cleaning

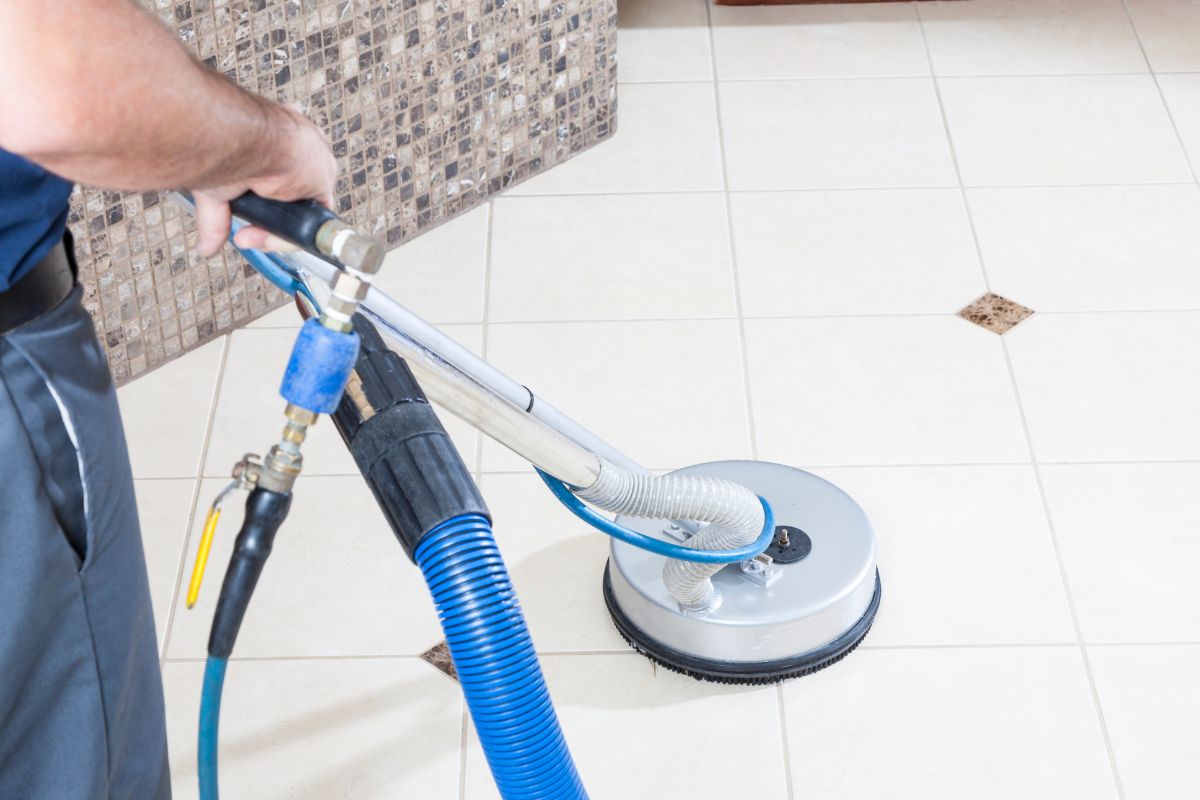
The Advantages of Professional Tile Cleaning

1. Improved Aesthetics

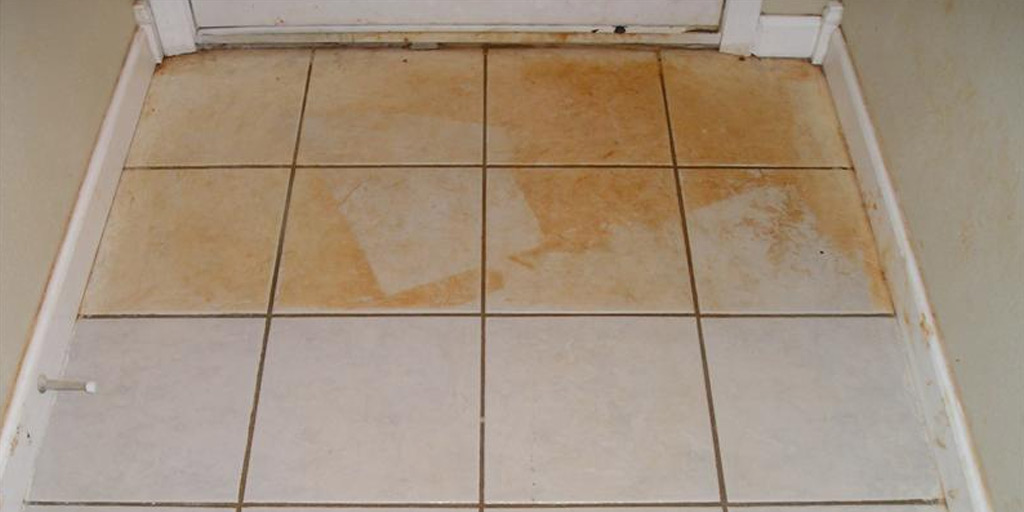
The first impression your business makes on clients and customers is essential. Dirty and stained tiles can deter potential clients, giving the impression of neglect and poor hygiene. Professional tile cleaners can restore the beauty of your tile surfaces, leaving them sparkling clean and appealing.

2. Enhanced Durability

Regular professional tile cleaning helps extend the lifespan of your tile surfaces. Dirt and grime can slowly erode the surface of tiles, leading to cracks and damage. Professional cleaners use specialized equipment and techniques to remove contaminants and preserve the integrity of your tiles.

3. Healthier Environment

Tiles can harbor allergens, bacteria, and mold if left uncleaned for extended periods. This can negatively impact the health of your employees and customers. Professional tile cleaners use eco-friendly products to eliminate these harmful elements, creating a healthier workspace.

4. Time and Cost-Efficiency

Attempting to clean tiles yourself or assigning the task to employees can be time-consuming and may not yield the desired results. Hiring professionals saves you time and money in the long run, as they have the expertise and equipment to complete the job efficiently.

5. Customized Solutions

Every business has unique tile surfaces with varying cleaning requirements. Professional tile cleaners assess your specific needs and provide tailored solutions, ensuring the best possible results for your business.

Conclusion

Investing in professional tile cleaning for your business is a smart decision that yields numerous benefits. From enhancing aesthetics and durability to creating a healthier environment, the advantages are clear. Plus, it saves you time and effort while providing customized solutions for your unique tile surfaces. Don’t underestimate the impact of clean tiles on your business’s overall image and success. Make the wise choice and hire professional tile cleaners today. Your business deserves it.

How To Clean Floor Grout Without Scrubbing? Follow These 7 Professional Tips?

Many areas of your house are vulnerable to dust and debris, hence it is necessary to know how to clean them thoroughly. These are the certain areas that need extra care and especially the floor grout should be cleaned using specific cleaning methods. This will help you in keeping the grout lines clean for longer. Using inappropriate cleaning agents or unnecessary scrubbing can be deteriorating. Because they can cause irreversible damage to your flooring. Therefore, by following the Tile and grout cleaning methods mentioned in this guide, you will know how to clean floor grout without scrubbing. In addition to this, there are certain factors that you need to know prior to carrying out the cleaning process. 

How To Clean Floor Grout Without Scrubbing

So, follow the professional tips from this guide that will help you in avoiding the damages that may occur if proper care is not taken. 

Professional Tips That You Need To Follow While Cleaning Your Floor Grout 

In order to attain the best results, it is necessary for you to follow certain rules and norms. Only then you will be able to reach your expectations of having clean grout lines. So long as knowing how to clean floor grout without scrubbing, you should also know the professional tips that experts have been following all this long. Since they are specially trained and experienced enough, they know very well about the best strategies and tips. By following these, you will be able to get desired results without causing any sort of damage to your flooring. The following are the 7 professional tips that you need to follow

  1. No Vigorous Scrubbing 

A lot of people prefer the lovely, enduring, and permanent impression that grouting between tiles creates. However, cleaning grout that has become mouldy, grimy, or discoloured is extremely difficult. The answer to the question concerning how to maintain floor grouting with no scrubbing is that there is no way to totally do away with cleaning.

But there are many ways to simplify it! Many of us are accustomed to getting used to cleaning the grout until it sparkles and looks brand-new. You wouldn’t believe it, but this isn’t the only option or perhaps the best method for thoroughly cleaning grout! 

  1. Use Proper Grout Cleaner

You can get your grout largely bright and clean by using the proper cleanser and letting the product itself do the bulk of the job. Certain cleaning agents will enable you to accomplish this with the least amount of work even if it is impossible to completely clean grout without any scrubbing. So, professionals often advise choosing the right cleaning products for the best results. 

  1. Regular Cleaning For Best Results

Whether you believe in the idea or not, regular cleaning can often give you the best results without having to scrub the grout lines. This will merely help you in decreasing the work of cleaning all the dirt at once. If you don’t clean the tiles and grout lines on a regular basis, they will build up mould, mildew and also dirt stains. This can make it difficult for you to clean them and make them look good. Whereas cleaning them on a regular basis will make the cleaning process easier for you. Hence, consider cleaning your grout lines without skipping. 

  1. Use Certain Kitchen Ingredients To Get Amazing Results 

You can definitely get surprised by this! But yes, it is true. There are several ingredients from your kitchen that can make your flooring sparkle including the grout lines without scrubbing. For this, the ingredients that can be used are vinegar, baking soda, lemon, etc. These ingredients in combination with others like rubbing alcohol, bleach, and sodium percarbonate can give effective results. In addition to this, you can mix them with multiple other things to maximise the results. 

  1. Steam Cleaning 

If you are struggling to tackle the dirt accumulated on the grout lines, then you are on the right path if you opt for steam cleaning. This makes use of the hot water extraction method where hot steam or vapour is used to clean the grout lines. All you need to do is maintain a 200°F temperature and make sure that the floor is properly exposed to steam. Steam cleaning is also best when it comes to eliminating mould and mildew that is tough to deal with, whereas it is pretty difficult if you opt for regular cleaning. So, choosing steam cleaning can be beneficial to you in more than one way. 

  1. Using Proper Grout Sealants And Colourants 

Nobody can realise the importance of grout sealants and colourants can make. When it comes to grout cleaning, most of the time the dirt and other particles often seep in. This can make the condition worse. Because it can not only make them look ugly but also promotes the growth of bacteria and other microbes. This further leads to mould growth. So to avoid all these you need to use proper grout sealants for best results. Along with this, colourants can also be helpful if you have discoloured grout lines.

  1. Seeking Experts’ Help 

In case you are looking for the best advice and are unable to find the perfect solution to your concern. It’s better to opt for services. Since professionals are well equipped and perfectly skilful, you can attain the best results. So, without trying unnecessary things like vigorous scrubbing or the usage of harsh chemicals on your own, you better contact experts for help in case you need any. 

Conclusion 

The cleaning methods and the strategies that are effective for cleaning grout lines can be different in different scenarios. But scrubbing should never be an option. Following the above-mentioned strategies and knowing how to clean floor grout without scrubbing can help you protect your grout for longer durations. In case you need professional advice, forget not to reach out to them. 

Can you imagine scrubbing the tiles on your hands and knees? Well, the effort would be worth it if the tiles were cleaned completely. However, cleaning the sticky residues from the tiles can be a pain. Using conventional floor cleaners doesn’t help much. This is where the high-pressure steam cleaner comes to the rescue. With this, you don’t have to worry about the usage of harsh chemicals that can tarnish the beauty of the tiles.

Tile Steam Cleaning Sydney

Want To Know How To Use The Steam Cleaner On Your Tiles?

There are several steps that you can follow in order to steam clean the tiles. Steam cleaning is an efficient and safe tile cleaning technique. Check out the steps listed here so that you can clean the tiles now with ease.

Step 1: Use a dust mop or a broom to sweep the tiles. It will aid in removing large dust particles and debris. For cleaning the tile walls, you can use a dust rag. With this, you can get rid of the cobwebs and other visible particles.

Step 2: Now, take the steam cleaner and unfasten the fill cap. Here, you have to fill up the water tank. It is advisable that you use distilled water. Now, various models have different tanks. Some may be a separate body, while in others, it is attached to the handle of the machine. Moreover, you must remember to not put cleaning products into the tank.

Step 3: Take the microfiber cloth that comes with the steam cleaner. Now, put it over the head of the machine. In this case, the variation occurs due to different models. Some machines use elastic to attach the cloth, while others come with a hook and latch system.

Step 4: After this, you must turn on the steam cleaner. For this, you will need to plug the machine out. You must wait till the water present in the tank heats. The time period required varies considerably from a few seconds to several minutes.

Step 5: In order to release the steam, you must either pump the steam handle or press the button. After this, move the cleaner over the tiles in the same way you mop it.

Step 6: After the floor is clean, you can move onto the walls. For this, you will need to place a new microfiber cloth. Keep in mind to unplug the cleaner before making the changes. Now, you can again plug it in and clean the tile walls.

Step 7: It is vital to keep in mind that cleaning the tiles floor and walls is slightly different. With walls, you must take a terry cloth to clean the tiles again after steam cleaning. It is to make sure that there is no accumulation of soap on the walls.

Step 8: Lastly, you must remember to unplug the machine after the completion of steam cleaning. After that, take out the microfiber cloth. You must allow the tiles to dry. Moreover, the dry times are shorter when compared to cleaning with water.

How To Choose The Best Steam Cleaner?

Purchasing the best steam cleaner is tricky. But, firstly, you will need to decide its purpose. If you want a steam cleaner that can serve multiple purposes, you need to look for models that come with various attachments. However, if you just want to clean the tile floor, then a general model is perfect. These machines can heat the water quickly and can keep the steam for about 30 minutes.

Now, there are several brands and models of steam cleaners. You must conduct extensive research before making any decision. If you are unable to purchase one due to financial constraints, you can always opt for the rental ones. However, you must make sure that they serve the purposes that you are renting them for.

Are You Seeking Professional Tile Steam Cleaning? Contact Experts Today!

Cleaning the dirt, debris, and grime on the corners of the tiles is a tedious task. Not to mention the harmful effect the chemicals have on the gorgeous tiles. The best way to clean them without causing any adverse effects is to opt for tile steam cleaning. Moreover, with this method, you can now protect yourself from dangerous chemicals. If that doesn’t do the trick, you need to get in touch with the professionals.

Tims Tile Cleaning Sydney are one of the best tile and grout cleaning service providers. Our team of reliable Tile Cleaners Sydney has years of expertise and up-to-date information on various cleaning techniques. Moreover, we use the latest materials and devices for excellent results. Furthermore, we charge affordable price rates and are available all the time. Give us a call at 02 8319 1071, and we will be there right away!

Deep cleaning can help in keeping your tiles in good condition. Just like you do the same for roofs, bathrooms and the entire premise. You must take good care of tiles as well. There are tiles and grouts that would be affected. Hence you must take up deep cleaning and make them fine once again. If you are looking for safe methods to clean your tiles deeply then there are many such products available in the market, but what matters the most is, what suits you the most.

Safe Methods To Clean Your Tiles Deeply
  1. Use safe home remedies to clean the tiles

The first and foremost thing that you must do is to check out the condition of the tiles. If the tiles are quite greasy and have filth in the grout then they should be cleaned deeply. You can use safe products like vinegar and soap water to clean grout. Another safe method for deep tiles and grout cleaning would be to use a paste of hydrogen peroxide and water. But you should be cautious while handling these chemicals. If you have pets and kids at home then you need to be extra careful. Saltwater, vinegar mixed with distilled water, baking soda and vinegar liquid and hydrogen peroxide mixed with vinegar are some of the safe and quick options to clean the grout. 

  1. Steam cleaning the grout

Steam cleaning the grout is also Safe Methods To Clean Your Tiles Deeply and this would include cleaning the tiles and grout with hot water. But one should be careful while handling hot water. Plan things well and see how there can be perfect measures to keep the home tiles and floor clean.

  1. Take professional help

Grout cleaning is quite tricky and you have to be perfect while cleaning the same. Often, while cleaning, the grout might be damaged. In order to avoid this, it would be better to call the professionals to take up deep tile and grout cleaning methods.

  1. Use stain remover on the tiles

You can buy a stain remover specifically meant for tiles. Take a cotton cloth or piece of a cotton swab and then dip the cotton in a stain remover solution. If you feel, you can make the solution mild with water. Now apply the stain remover to the hard stains. Once you have finished with the cleaning, you must wash your hands properly as there would be bacteria in your hands or there would be some chemicals that might have spilled in your hands.

  1. Use tile grout cleaner

It is true that tile and grout cleaning can be quite challenging, but one should go ahead with the same as tile and grout can be a breeding ground for germs. Thus, if you want to stay away from such unhygienic conditions, you must be specific enough in keeping things clean. So, buy a cleaner and use the same for the tiles and grouts cleaning.

Conclusion

Many options are available as a safe choice for cleaning tiles deeply, you can follow the one that suits your problems and tiles. Also, You can Hire Expert Tile and Grout Cleaners in Sydney to make your tile cleaning job easy.

Every homeowner wants to have clean and stain-free bathroom tiles as it increases the overall look of the bathroom. Do you want to keep your bathroom tiles clean and free from stains? Do you want to get Home remedies to remove bathroom tiles stubborn stains? If yes then go through these quick and simple home remedies that remove tough stains-

Remove Bathroom Tiles Stubborn Stains
  1. Use of vinegar

Stained bathroom tiles don’t look good. So, you need to follow some home remedies to remove the stains and keep the bathroom clean. One thing to notice is that your bathroom gets more dirty than usual as there will be continuous usage of water and footwear. What should be done to remove the stains from bathroom tiles? For this, you can try out vinegar as an effective home remedy. 

Vinegar is one of the best home remedies to remove bathroom tiles stubborn stains that one can use. You can use it to remove hard water stains and other stains from bathroom tiles. So, this is mainly an all-purpose cleaner that has somewhat acidic properties.

The acidic content of vinegar makes it perfect for removing stubborn stains from the bathroom tiles. For this, you need to prepare a solution of vinegar and water in equal amounts. Spray this solution on your tile and then let it sit for some time. After some time, use a brush to scrub the area of the bathroom. This will help you to remove all the tough stains of hard water from the bathroom tiles.

  1. Baking soda

Another quick and effective home remedy that you should try for cleaning the bathroom tiles is baking soda. This kitchen ingredient can be seen in every home. All that you need to do is to mix half cup baking soda of half cup with one spoon of dish wash liquid and a half cup of vinegar. Add water to prepare the solution and then pour it into a spray bottle.

Make sure you’re using only hot water for this home remedy to see effective results and the removal of tough stains. You just need to spray this mixture on tile stains and grout lines and then leave it there for some time. After doing this, you need to mop it with warm water to see effective results.

  1. Salt 

One of the best home remedies to remove bathroom tiles stubborn stains is the salt scrub. No doubt, salt is an effective home remedy that not only removes stations from the tiles but also kills microorganisms that are available in the bathroom.

So, you just need to sprinkle a generous amount of salt on the bathroom tiles and then let it for a few hours. After that, you need to clean it with warm water.

Conclusion

Many different home remedies show immediate effect in the cleaning of the bathroom tiles. The above mentioned home remedies to remove bathroom tiles stubborn stains are the best ones that you can try. You may need a Professional Tile and grout cleaner. It is recommended you try these first.

Tile cleaning is as important as any other thing in your house. Uncleaned tiles and grout contain a lot of dust and germs that can cause many diseases. Uncleaned grouts can also contain a lot of harmful bacteria that are not good for humans and the environment as well. Professional tile and grout cleaning services will help you in many ways. Professional grout cleaners have experience and tools that help in removing all the stains and dirt from the grouts. The techniques used by professionals are completely different and more effective. To get detailed information on how professional grout cleaners clean grout, read the blog thoroughly. 

How Do Professional Grout Cleaners Clean Grout

The most common method used by professionals to clean the grout is the grout deep cleaning method which involves the steam cleaning method as well. This method goes well in removing all kinds of dirt and bacteria from the grouts. Steam cleaning is very much helpful in getting rid of stains and bacteria without the involvement of any kind of chemicals that can cause damage to you or your family. A machine scrubber is also one of the options that can be useful in getting rid of the dirt and dust from the grout. 

Importance Of Professional Grout Cleaning Services- 

  • To Remove The Dirt Deep Down- Sometimes the dirt particles settle deep into the surface of the tiles and only professionals can remove them using the best techniques. 
  • Saving Money And Time- Everyone loves to spend time with their family on the weekend instead of cleaning tiles. Professionals can help in cleaning your tiles quickly and save you time. The tools professionals use are highly advanced that can easily clean your tiles and avoid any kind of damage. By this, you can save a lot of your money. 
  • Applying Sealants- Applying sealants is also important to keep your tiles and grout safe from dirt and stains. Experts know the right sealing products for your tiles and they know the right sealing techniques too. 

Professional Grout Deep Cleaning Services- 

Step 1- Vacuuming- To remove the excess dirt and dust from the surface of the tiles and grouts, you can take the help of a broom or a vacuum cleaner. Although a vacuum cleaner is more effective than a broom. Professionals use this process to get rid of all kinds of dirt from the grout. In this step, a nozzle brush is attached to the front of the vacuum cleaner. It is moved all over the grouts properly. This is an important step used by professional grout cleaners to clean the grout. 

Step 2- Mopping- Mopping helps in removing the stains from the surface and also helps in loosening up the dry soil that is present in the grouts. To avoid streaking dirt professional cleaners always rinse after mopping. And also change the mop water after every use. 

Step 3- Steam Cleaning- This is the third and the most important step used by professional grout cleaners to clean the grout. This step involves a steam cleaner that is the main equipment to get rid of all the stains and dirt. Steam cleaning is also known as hot water extraction services. In this step, a crevice attachment tool is connected to a steam cleaner. You must start from a small area and gradually move it towards all the corners of the tiles and the grout. 

In this method, the pressure exerted from hot water steam helps in removing the dirt and the stains from the tile cracks and the grouts as well. 

The benefit of this steam cleaning is that it doesn’t require any chemicals for cleaning the grout. One of the other alternative methods is using a machine scrubber. 

The sight of efflorescence on tile and grout may mar an otherwise exquisite bathroom shower design. In addition to being unattractive, it may cause plumbing issues and tile damage if not removed. The use of sharp devices to remove efflorescence is a typical source of surface scratches. We’ll go through the best practices for removing efflorescence. Before we can advise you on the best way of efflorescence removal, you must first understand the characteristics of this build-up. Efflorescence can fade away the quality of your floor. If you want to maintain the quality and looks of your home, then it’s the right platform. Tims Tile Cleaning Sydney help you to know how to remove efflorescence from tiles. Continue reading: 

How To Remove Efflorescence From Tiles

What Is Efflorescence?

After the water evaporates, a coating of mineral and calcium deposits on the surface known as efflorescence will remain. The leak is caused by moisture or water under the tile from the installation procedure. Water reacts with the minerals in the concrete’s mud layer, expands, and eventually seeps or drains outside. If you don’t get rid of it on time, it might harm the tile and grout in your shower and clog the drain.

What Is The Purpose Of Efflorescence?

The major cause of the efflorescence is the presence of calcium and mineral deposits in the concrete mix used to install the tile. Furthermore, efflorescence occurs when water penetrates under the tile and interacts with the minerals already there. This treatment reaches the topmost layers of the surface, where water vaporises. The particles ultimately wind up on the grout and tile surfaces. Thus, efflorescence generation is limited to porous surfaces. Because of its porousness, water may flow easily in both directions.

The general population often misidentifies efflorescence as mould. Unlike mould, however, the white cement-like residue is neither communicable nor dangerous to human health. It has no effect other than to ruin the shower floor. Now that we know what causes efflorescence, let us understand how to get rid of it.

Threats Related to Efflorescence:

  • The appearance of efflorescence on the shower grout and tiles indicates the presence of water behind the walls or under the flooring. If nothing is done to remedy the moisture, it may cause mould development, structural degradation, termite infestation, and other problems in the future.
  • If there is an abundance of efflorescence, drains may get plugged and tiles may fracture. If this continues, the cost of repairing the tile and grout will increase.
  • It is not harmful to your health.

How Can Efflorescence Be Removed?

Though the deposit may gradually disappear over time, chemical treatment is often necessary. How to Remove Efflorescence from Tiles Using Chemicals; Learn now: 

  • Use only proprietary items that are acid-based, safe, and authorised for use in your particular application, as directed by the manufacturer. Allow it to stay for a few minutes before thoroughly rinsing it with clean water.
  • Before administering the therapy to the whole region, treat a small area as a test. Before treating a whole floor or wall, practise ensuring you have the proper technique.
  • Use acid cleansers on newly placed tiles only after they have fully dried, since this may cause efflorescence to resurface by bringing additional soluble salts to the surface.
  • Unless absolutely required, tile flooring should not be sealed. However, the installation must be completely dry and the grout must have cured to the correct colour before being used, like with terracotta tiles. The salt accumulation will be permanently trapped if it is not removed before the space is closed.

Which Methods Exist to Remove Efflorescence?

Tile and grout efflorescence is readily removed. This may be accomplished with both chemical cleaners and sandblasting. However, sandblasting may badly harm the tile’s surface. A chemical cleaning is recommended to remove efflorescence from the shower.

The following is the process for Efflorescence Elimination:

  • To get access to and clean the drain in a shower, first remove the lid.
  • The efflorescence mass must then be removed.
  • To eliminate any lingering efflorescence, apply chemicals to the whole surface. This chemical targets the salts in the residue, totally dissolving them from the mud. The chemical solution can assist in the removal of efflorescence that has accumulated underneath the tiles.
  • Efflorescence can be cleaned up, but there are also preventative precautions you may take. To protect the porous tile and grout against water seepage from the outside, the surface must be made waterproof. This is readily performed by first applying a layer of grout sealer to the whole tile and grout surface. 

Conclusion

It is really mandatory to clean the tiles and remove the stuck inside Efflorescence from them. Numbers of people are stuck at a point, on how they are supposed to do that. Following the things we have mentioned above, you will come to know how to remove Efflorescence from tiles. Consider every assistance we are forwarding to you and understand the concept of removing the efflorescence from the tiles to make the floor looks beautiful and perfect.  

How To Clean Grout- The Best Ways To Tackle Shower, Wall and Floor Tiles

Over time, your floor can look dull and unappealing. This can be because of the dirty tile and grout. Tile and grout must be clean in order to make your whole flooring look good. Cleaning grout is also not an easy job. You must have the proper knowledge and skills for cleaning the grout. Knowing how to clean grout is very important. Whether you are dealing with shower tiles, wall tiles, or floor tiles. Dirty and damaged grout not only disrupts the appearance of your house but also contains bacteria that can cause health issues for your family. 

Fortunately, it is quite easy to clean the grout using the items available at home. So, if you want your tile grout to look good, we are here with some interesting grout cleaning hacks that will help you in cleaning the shower, wall, and floor grout easily. It will take no time in cleaning the grout and once you are done, you will be amazed by the results. With these grout cleaning methods, you can save your family from all the diseases caused by the bacteria in the grout and improve your appearance. Hire professional tile cleaners for quality services.

How To Clean Grout

Check Out The Whole Blog to Understand How to Clean Grout

  • Cleaning shower grout- Run a hot shower by closing all the doors and windows of your bathroom before cleaning. Now, make a paste out of bleach and baking soda or powder, apply this paste onto the shower grout using a soft cotton bud or cotton wool. Let it sit for about 10-15 minutes and wipe off after a shower with a dry cloth, especially in the corners. One trick that you can use for the tight corners is to use a toothbrush instead of a cotton bud while applying the paste.
  • Cleaning floor grout- For floor tiles, you need to mix a cup of hydrogen peroxide with a cup of baking soda. Apply this solution to the grout with the help of an old toothbrush and leave it for about 10-15 minutes. Now, scrub it with the toothbrush, and after that rinse it with warm water. 

Common Methods Used for Cleaning Grout From Wall tiles and other areas

  • Just water- Yes, plain water also works wonders when it comes to grout cleaning. Many times, just water can do a lot that other chemicals cannot do. Use warm water and a good scrubbing brush to scrub off the dirt from the grout. Do it in circular motions for better removal of the wall grout dirt.
  • Whitening toothpaste- Put some whitening toothpaste onto your old toothbrush and start scrubbing your grout. The toothpaste here acts as a mild abrasive and helps to remove all the dirt and black spots from your grout. 
  • Vinegar- Vinegar is the most common and one and only solution that helps with a lot of home problems. Mix equal parts of vinegar and warm water into a spray bottle and spray this solution over the grout. Wait for 5-6 minutes before scrubbing it off from the wall tiles. Make sure you use a stiff brush while scrubbing it. You can also spray vinegar regularly to keep the grout in good condition.
  • Baking soda and vinegar- Make a thick paste of white vinegar and baking soda. Apply this paste to the grout using an old toothbrush. Let it settle onto the grout for about 15-18 minutes and then rinse it off. White vinegar will make the mixture fizzy and cause the grout to look as good as new.
  • Bleach- Bleach is ideal for cleaning the stubborn grout stains that refuse to go. There are two methods of using bleach. One is to dip your old toothbrush in bleach and scrub it over grout. Another method is to make a paste out of bleach and baking soda. The paste should be as thick as toothpaste. Apply and let it sit on the grout for 15 minutes. Scrub it with an old brush and rinse away the remaining or use a wet cloth for removing the paste. 

So, you read the full details on How To Clean Grout- The Best Ways To Tackle Shower, Wall, and Floor Tiles. However, you can also hire professional tile cleaners to get these cleanings done more efficiently and appropriately. Our staff have Certificate III in Cleaning Operations.

After spending a lot of money on tiles everyone wants their tiles to be shiny and good-looking. To keep the beauty of your tiles maintained and to prolong their lifespan, it is important to clean them regularly. Efflorescence is something that needs to be eliminated from the tile floors and there are various ways to do it. Efflorescence is small tiny hazy particles and white deposits that get accumulated on the tiles due to moisture. Although these are not harmful, they can ruin the beauty of the tiles. To know more about how to remove efflorescence from tile floors, read the blog completely.

 Remove Efflorescence From Tile Floors

What Causes Efflorescence?

Efflorescence can be caused by many reasons and can affect the beauty of your tiles. There are various ways to remove efflorescence from the tiles too. Some of the main reasons why efflorescence is caused are-

  • Ongoing Damp And Humidity- This is one of the main reasons why efflorescence is caused. This may occur when the drying of the surface after installation takes longer time than expected.
  • Accumulation Of Water On The Surface- When the water spill stays for too long on the surface, it results in the formation of efflorescence.
  • Naturally Occurring Salts- The products professionals use for tiling the surface might consist of natural salts which can result in efflorescence.

How To Avoid Efflorescence?

Efflorescence can be formed due to many reasons and to avoid them you can use the following steps.

  • Removing Moisture From The Surface- Moisture can be formed when excess water gets accumulated on the surface which leads to the formation of efflorescence. Excess water must be removed from the surface. This is useful to remove efflorescence from tile floors.
  • Take Precautions Against humidity- Humidity can be one of the main reasons for the formation of efflorescence on the tile floors. You must avoid grouting in the areas when the temperature falls.

How To Remove Efflorescence From Tile Floors?

Efflorescence generally is removed naturally and they disappear with time but if you are looking to remove them quickly you can use methods like decalcification to get rid of them. Although this method will not remove efflorescence completely, after some point it might come back. You can use the steps given below to remove efflorescence from tile floors.

  1. Gather Things Required- To remove the efflorescence from the tiles you will require some products that are given below-
    • Cleaning solution
    • Scrub or Brush
    • Broom
    • Bucket
    • Clean water
    • Cotton towels
  2. Read The Label- Before starting to clean the efflorescence from the tiles you need to know about the cleaning product you are using for efflorescence removal. You will get complete information on the manual instruction about how to remove efflorescence from the tile floors.
  3. Wear Protective Gear- You should wear gloves and a jacket and eye protection too.
  4. Broom The Tile Floors- To remove the excess dirt from the tile floors, you need to sweep the area using a broom. Make sure you remove dirt from all the corners of the floors. You can also use a vacuum cleaner to remove the dust from the floors.
  5. Apply The Cleaning Solution- Once you remove the dust from the surface of the floors, you must apply the cleaning solution on all the parts of the tiles. Wait for 10 minutes and let the solution dwell on the surface. Make sure you don’t let the solution dry on the surface. This is an important step to remove efflorescence from tile floors.
  6. Scrub- Once the solution gets settled you should scrub the area using a nylon pad, scrub brush or a scrub machine to get rid of the efflorescence from the surface.
  7. Remove The Solution- Once the efflorescence is removed from the surface of the tile floors, remove the solution using a mop or a wet vac.
  8. Rinse With Clean Water- Once the solution is removed you must rinse the area with clean water. Once cleaned you must air dry the surface. You can repeat the following steps if the stains do not get removed properly. These are the steps used to remove efflorescence from tile floors.

Hire Professional Cleaning Services – Make Efflorescence Removal Easy

Professional cleaners can help you with safe methods to clean your tiles deeply and rid of all kinds of stains on the tiles. Professionals know the right ways to remove the efflorescence from the tiles too. In case you are looking for the best tile cleaning company in Sydney, you can hire the cleaners at Tims Tile Cleaning Sydney.

We are amongst the best tile cleaning service providers in Sydney. We use the latest tools and techniques for removing stains and efflorescence from tile floors. Our experts specialised to remove efflorescence from tile floors. Give us a call now at 02 8319 1071 and get a useful solution for your tile problems.

The grout around the shower tiles may change colour due to mould, mildew, dirt, or spilled personal care products. Tiles are made of durable materials, which are easily maintained and cleaned, but keeping the grout between them looking clean can be a big challenge. Learn the best ways to deep clean tile and grout and maintain your grout while maintaining the condition of the tiles. Call Tims Tile and Grout Cleaning Sydney a professional tile cleaning company.

A Deep Tile And Grout Cleaning

1. Rinse With Warm Water

Start cleaning the grout with warm water and a stiff brush. You may find it very helpful to use a spray bottle with a pressed, targeted system. Scrub the grout with a circular motion to release all the dirt and grime, repeating the process several times. Also, a steam mop can serve as a simple, highly effective, and environmentally friendly way to clean grout. This machine removes hot water as steam to help to lift stains, especially in combination with the intended scrub.

2. Diluted Vinegar

Vinegar is a non-toxic substance that can be really very effective in cleaning grout. Dilute acid by mixing equal parts of vinegar and water and then using a brush or spray bottle, apply this mixture to the grout. Wait for 5 minutes for the mixture to dry before rubbing in a circular motion with a brush.

3. Baking Soda Paste

Baking soda and water make a strong, satin-coating paste. Fitted with a brush with strong bristles or a sponge, this paste can help to remove grout stains, reducing effort. Baking soda also has natural anti-inflammatory properties, especially when combined with vinegar. If baking soda and water alone are not enough to remove the stains, use this paste to soak and sprinkle with vinegar and wait for the foam to form on the surface. This foam has a soothing effect, especially if you wait a few minutes for deep tile and grout cleaning, before starting to scrub.

4. Hydrogen Peroxide

Hydrogen peroxide is another soft, flushing solution that can remove stains, and mildew from the bathroom. Try using hydrogen peroxide alone, sprayed with a spray bottle or cloth, and scrubbing the grout with a brush. For strong spots, it can be mixed with baking soda also to make a sticky paste.

5. Chlorine Bleach 

Regular use of chlorine bleach can cause your grout to break down quickly, leading to safety or cracking, which may lead to recurrence. Chlorine bleach is effective on some stubborn stains, but always be sure to use bleach as a last resort. In general, to Deep Tile And Grout Cleaning experts recommend avoiding chlorine bleach, and using only a small amount of this solution at stubborn levels, but washing the areas carefully before using them in any way is an important step in preventing accidental reactions.

6. Use Steam To Scrub All The Bathroom Tiles

In the bathroom, you probably look at not only the excess dirt and debris but also the remains of soap scum, which can be really very difficult to remove. By spraying tile flooring and shower walls with a surface cleaner, and then soaking hot water for five minutes until steam builds up. You may also contact us at 02 8319 1071 for further information.